Product Description
Product Details
Shipping & Delivery
What You Get
Product Installation Guide
Your birthday event deserves a touch of brilliance, and that's where our LED Neon Flex Happy Birthday Beautiful sign comes in. These vibrant LED lights breathe life into your celebration's atmosphere, elevating it to new heights. With meticulous craftsmanship, our LED neon signs work like magic, effortlessly turning any venue into a mesmerizing birthday extravaganza. Watch as your special day transforms into a dazzling and enchanting experience, as unique and beautiful as you are
Best Places to Install Girl Power Birthday Neon Sign
-
Entrance or Welcome Area
Create a warm and inviting atmosphere by placing the LED neon sign at the entrance of the birthday party venue. It will immediately catch guests' attention and set the tone for the celebration. -
Backdrop for Photos
Designate a photo booth or backdrop area where guests can take pictures to capture memories from the birthday event. Position the Girl Power Birthday neon sign as a stunning focal point. That enhances the aesthetics of the photos. The LED lights will add a glamorous touch to the pictures. -
Cake Table
Make the birthday girl feel special by placing the neon sign above the cake table. This will draw attention to the birthday cake and create a delightful centerpiece for the celebration. -
Dance Floor or Party Area
Consider installing the LED neon sign nearby if there's a designated dance floor or party area. It can serve as a fantastic backdrop while guests dance and celebrate. The neon lights will add energy and excitement to the atmosphere. -
Gift and Favor Table
Decorate the gift and favor table with the "Girl Power Birthday" neon sign. This will add a touch of elegance to the area and make it easy for guests to locate where to place their gifts or pick up party favors.
- Design
Each sign boasts intricate detailing, precise typography, and vivid coloration to enhance the visual appeal of your event. - LED Lights
These LEDs provide brilliant luminosity and boast eco-friendly attributes, contributing to a sustainable celebration. - Flexible Neon Flex
You can effortlessly bend and shape them to suit your creative vision, whether you hang them gracefully on a wall, position them as a centerpiece, or create a customized display that captivates your guests. - Easy Installation
The neon signs have user-friendly hanging hooks and a reliable power adapter, ensuring a swift and hassle-free setup. - Versatile Use
Beyond birthdays, our neon signs are versatile enough to adorn various celebrations and gatherings. Their ability to add an elegant yet playful touch makes them an adaptable and reusable decor choice for any occasion, from weddings and anniversaries to themed parties.
When you buy LED Girl Power Birthday Neon Sign Lights from NeonChamp, you can expect your order to arrive promptly anywhere in the UK. Whether you choose the rush or standard shipping option, we do our best to get your Neon Signs to you as soon as possible!
To safeguard your delivery, we offer a non-confusing clear refund policy. In addition, you can reach out to us for a full refund if the neon lights are faulty or damaged during transit.
Shipping DetailsUnboxing Your Neon Sign Kit
We know you are excited to receive your custom Girl Power Birthday Neon Sign, which we pack with loads of love. But what’s inside should not be a mystery to you, that is why we uncover all the details.
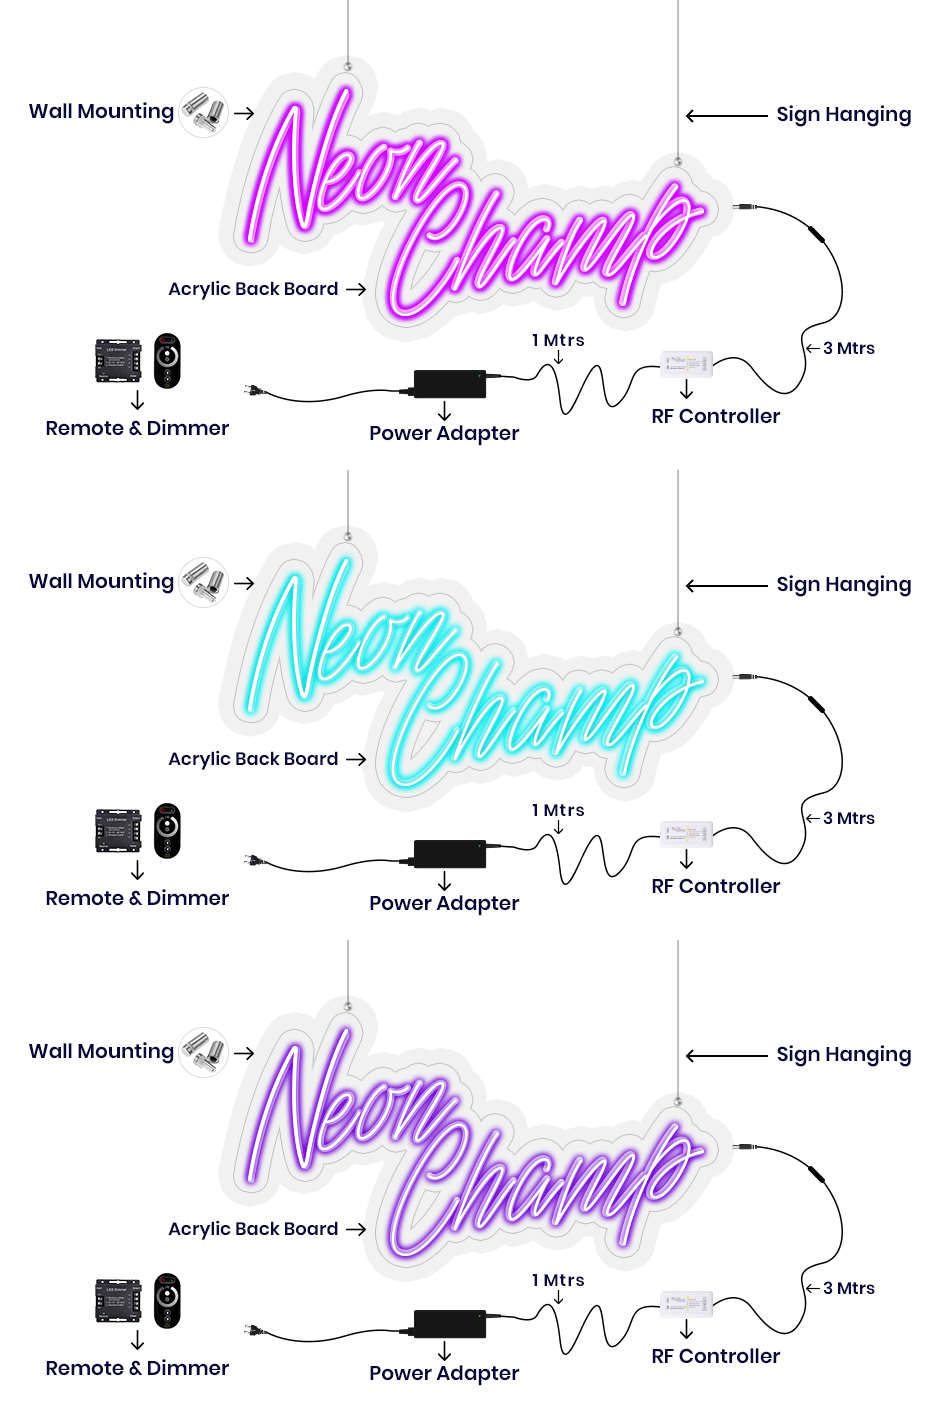
All the Neon signs that we send are well-equipped with clear acrylic boards having pre-drilled holes and SS mounting screws which makes hanging easy. Also, the neon signs are clubbed with a power cord which you can attach to power adapter. Also, you get an option to adjust the brightness of your custom-made neon sign via a remote controller.

Glow Your Neon Sign in Style with NeonChamp
First begin by plugging in the power adapter
Insert the power adapter safely to ensure that the neon light get started as you want
Next, connect the power adapter output to RF Controller
Now that the power adapter is safely inserted it's time to connect the power adapter to RF controller
Now connect RF Controller output to the Neon Connector
Next, connect the RF controller to the neon connector which is a very simple process and won't take much time
Adjust Brightness with remote controller and done.
Set the brightness using a remote controller according to your décor or mood and get it started.
Why NeonChamp
Energy & Cost Efficient
Free Delivery
3 Years Warranty
Easy Returns


